TRENDING
Blow by blow reports from Foxborough 250-450 AMA SX
April 14, 2024
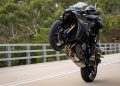
BMW R 1300 GS Trophy X Review – Motorcycle Test
April 17, 2024
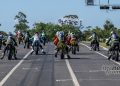
Records tumble at Fusport FIM MiniGP Australia in Newcastle
April 17, 2024
Recapping MotoGP/2/3 action from COTA on Friday
April 13, 2024
Harley-Davidson ‘Number One’ winner announced
April 17, 2024
SP Connect SPC+ Mounts arrive in Australia
April 16, 2024
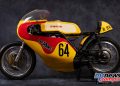
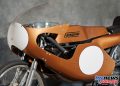
Ducati’s iconic 1975 900 Super Sport
April 18, 2024
Next
Prev


SUPPORT OUR SUPPORTERS


LATEST BIKES, REVIEWS AND FEATURES


RACING


SUPPORT OUR SUPPORTERS


POPULAR
LATEST PRODUCTS


MCNEWS.COM.AU is a specialist on-line resource that provides motorcycle news for motorcyclists. MCNews covers all areas of interest for the motorcycling public including news, reviews and comprehensive racing coverage.